Pressing YubiKeys
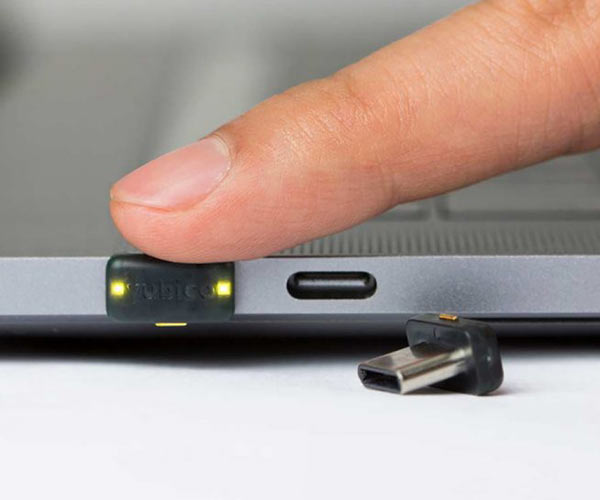
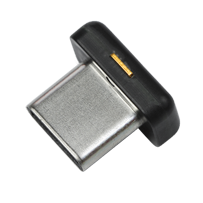
If you work in tech, you probably have a YubiKey. I have this one, the YubiKey 5C Nano:
If you don’t work in tech but primarily work on your laptop, you probably should have a YubiKey. And if you work on a political campaign or as a journalist, you should definitely have one (or something similar). Talk to your IT Security department about that. This post will mostly be about something your IT Security department doesn’t want to hear about, though, so maybe don’t mention it to them.
YubiKeys act as two-factor authentication. This means that after you log-in to a system with your username and password, the system requires you to authorize in a second way as well. This way if your login credentials are compromised, the attacker would also have to compromise the second form of authentication, which is harder.
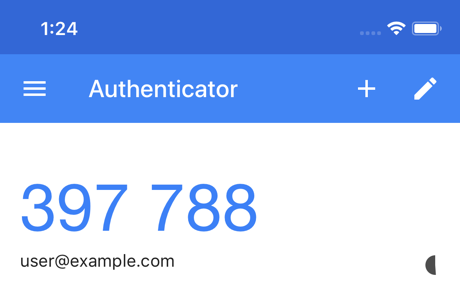
There are different forms of two-factor authentication - a common one is that a website will ask you to scan a QR code with the Google Authenticator app (or similar) on your phone which will generate 6 digit codes. The way this works is that the server and the app both have a shared secret. The phone generates codes based on that secret and the current timestamp and the server generates the same codes and sees if they match.

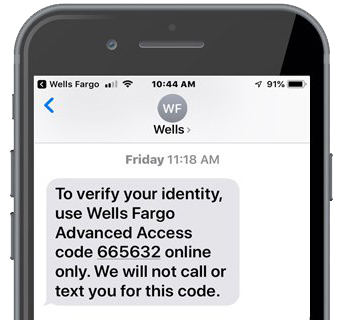
Another one is SMS-based 2FA, which is pretty widely regarded as insecure. In this case, the server generates a code and sends it to your phone via SMS. The reason it’s considered insecure is that an attack exists called SIM-jacking where someone convinces a cell phone carrier to port a number to a new SIM card, effectively directing all SMS traffic to their phone instead of yours.
YubiKeys are small devices that plug in to the USB port of your computer and emulate a keyboard. When tapped, they emit a one-time password (OTP) which can be then verified by a validation server. A private key exists on the device which is used to sign information, but it can never leave the device because it is stored in a tamper-resistant environment.
The YubiKey that I use is designed to always sit in a USB port of my laptop, so whenever I would take my laptop from my desk to a conference room or to another office, it was always available. But like many new remote workers, my laptop never leaves my desk anymore. I have it hooked up to an external monitor and to save some desk space, I have it in clamshell mode sitting vertically on a stand.
This makes tapping the YubiKey difficult, especially when I store my laptop far away from my keyboard and mouse. I solved this by buying a USB-C extension cable, which brought the YubiKey closer to my keyboard.
One thing I haven’t mentioned about the YubiKey 5C Nano is that it’s kind of difficult to tap, even without the distance issues. The target area that you need to touch is extremely small:
One of the features of the YubiKey is that the little metal strip determines that it is being tapped by a human - this prevents it from being accidentally triggered by bumping your laptop into something, but if you’ve ever seen a one-time password in a Slack channel or Google Doc like tlerefhcvijlngibueiiuhkeibbcbecehvjiklltnbbl, you know it isn’t a perfect system. I would estimate that 1 in 5 times that I attempt to trigger it, it doesn’t register.
A lot of thought has gone into ensuring that the YubiKey can’t be triggered from software on the computer itself.
Before we go any further, I’d like to acknowledge the reasons for this. If a remote attacker were to compromise your laptop, being able to trigger the YubiKey from software on the computer defeats the whole point of using the YubiKey. But I think we always make tradeoffs between security and convenience - for example, you often don’t have to enter your YubiKey every time you access a system, some systems will only ask you once and not ask you again on subsequent logins for a certain amount of time. When you use a 2FA system and it gives you “backup codes”, do you always print those out and store them in a safe location? Everyone should figure out what level of security and convenience they are okay with.
With that being said, let’s talk about how you could trigger a YubiKey with software.
I’ve been calling this mechanism The Finger.
Hardware
First, we need some way for the computer to talk to The Finger. I had a bunch of these IZOKEE D1 Mini development boards lying around, they are smaller versions of boards that use the infamous ESP8266 chip found in a lot of IoT devices.
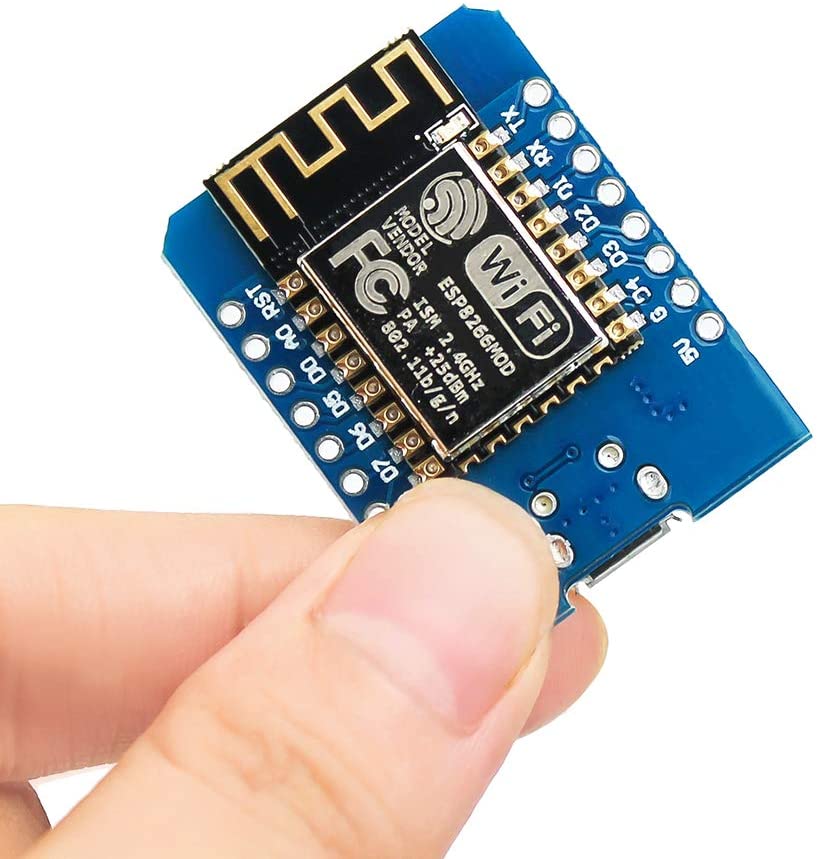
We can connect this to the laptop and talk to it over USB serial, but since it has WiFi, we can also just run a webserver on it and send it HTTP requests.
Next, we need some way to push The Finger towards the Yubikey. After a little googling, I found that the 28BYJ-48 stepper motor interfaces well with the D1 Mini board.
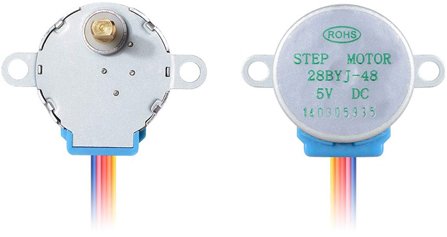
Stepper motors convert electrical pulses into mechanical rotation and the D1 Mini has pins for sending electrical pulses.
But stepper motors rotate and we mostly just need to poke in a straight direction. So I searched on Thingiverse for “28BYJ-48” and found this: 28BYJ-48 Motor Halter.
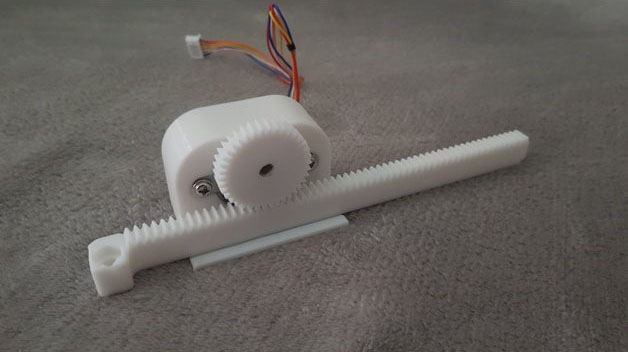
This attaches a gear to the motor which can guide a long rack forward and backward. But if we’re going to push a long plastic thing toward the YubiKey, it might as well look like a finger. Back to Thingiverse, this time searching for “finger” and I found this model someone made for Halloween:
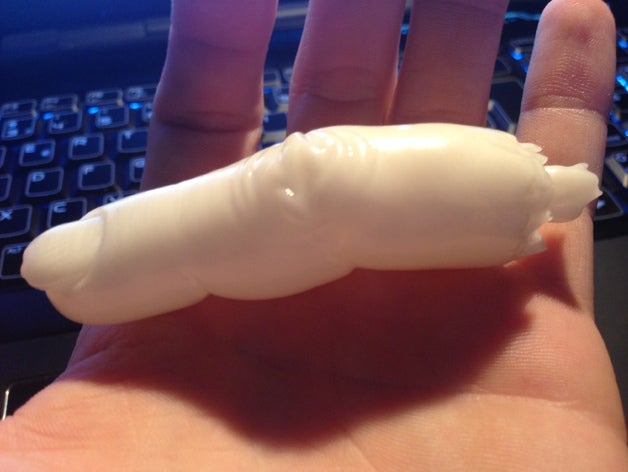
I opened up these two models in Fusion 360 and used an advanced CAD technique called “smooshing”, resulting in this:

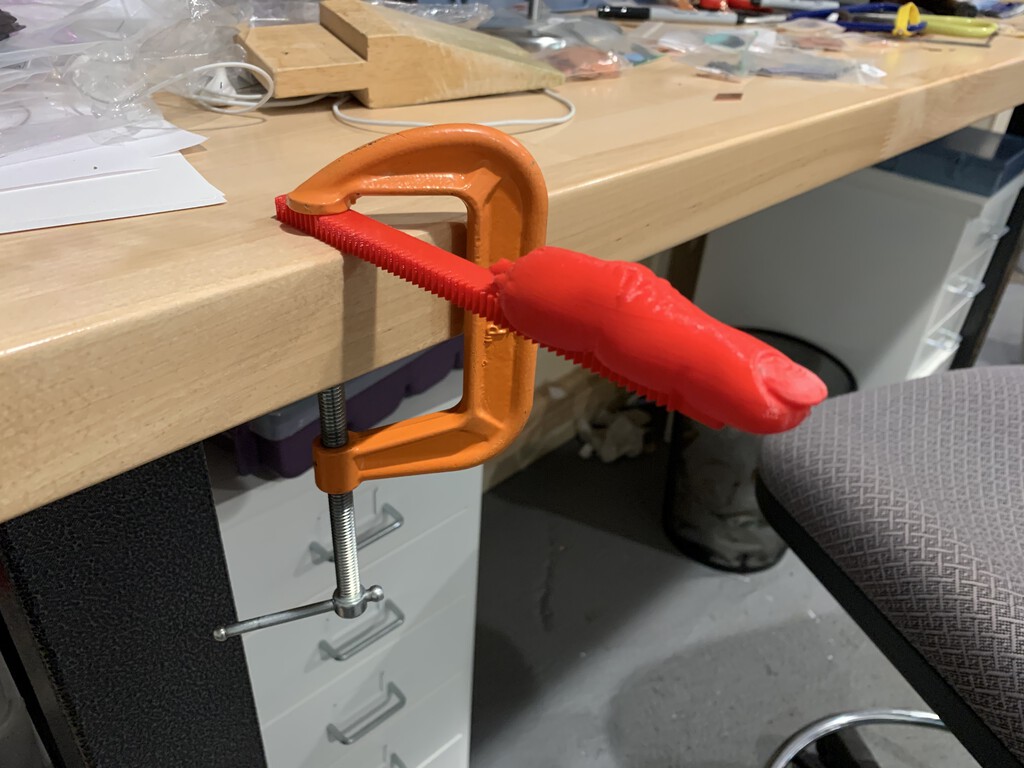
Next, I exported the smooshed STL and 3D printed it in Prusament PLA Lipstick Red because that’s what I happened to have in my printer at the time. Then I took the plastic finger and touched the YubiKey which.. didn’t do anything. I picked up a metal screw on my desk and touched the YubiKey, which immediately spit out a OTP. So then I took the finger and secured it to my desk with a vise and drilled a small hole in it, then screwed the metal screw into it and touched it to the YubiKey, which again did nothing.
That’s when I realized that I’m an idiot and that when I had touched the metal screw to the Yubikey, it was just transmitting the electrical charge from my body to the metal screw, which then transmitted it to the capacitive touch sensor on the YubiKey. So how could I trick the capacitive touch sensor into thinking it was a real finger?
I guessed that the way that capacitive touch sensors work is that they’re measuring your body’s capacitance to ground, so if we just hook up the sensor directly towards ground, it’ll think that its really conductive or at least conductive enough for a human finger to be between the two. So I took an insulated wire, unscrewed the metal screw slightly, wrapped it around the screw and tightened it again. Then I took the other end and connected it the GND port on the D1 Mini board, touched it to the YubiKey, and it worked!
Now the driver board for the stepper motor already connects to the 5V and GND on the D1 Mini, so I thought I might have to strip the GND wire and run it to both the driver board and the screw, but on a whim I decided to just wedge the end of the wire from the metal screw between the stepper motor metal body (figuring the metal body case was grounded) and the plastic housing. This also worked!
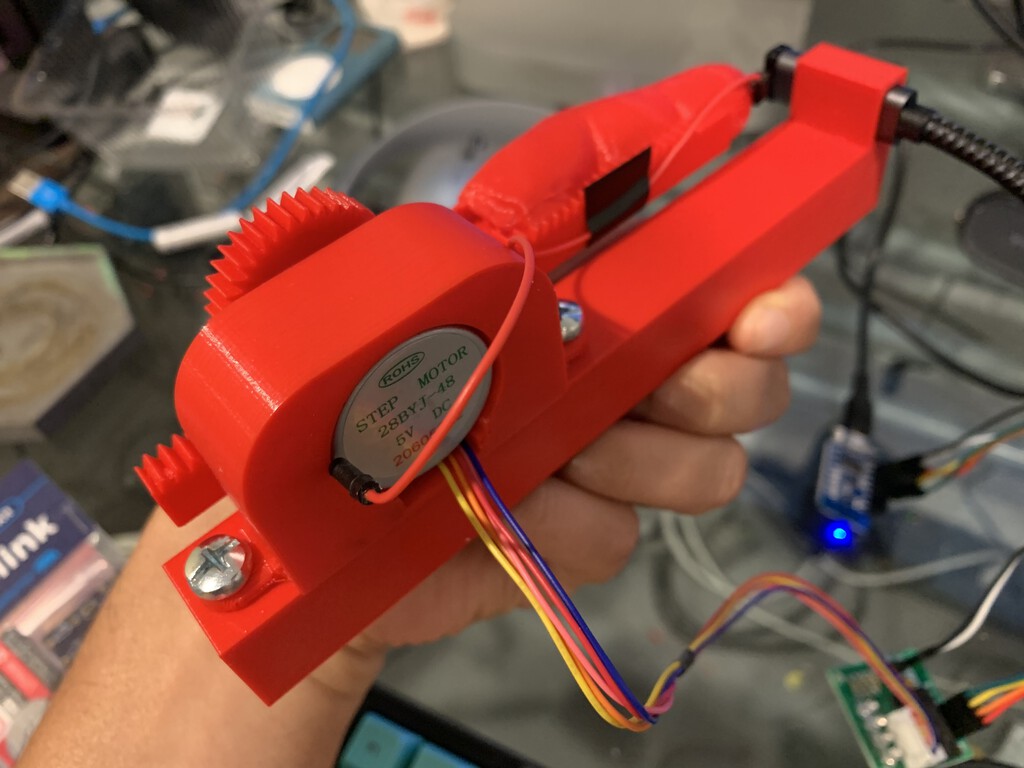
Once I confirmed that the finger would trigger the YubiKey, I needed a way to mount the YubiKey close to the finger, so I used my digital calipers to measure the size of the USB-C extension cable and designed a holder in Fusion 360.

The USB-C extension cable would go into the hole on the left and the motor would mount on the right.
At this point, we have to wire the stepper motor driver board to the D1 Mini. This can be done by soldering some headers onto the D1 Mini and then connecting some Dupont jumper wires between them.
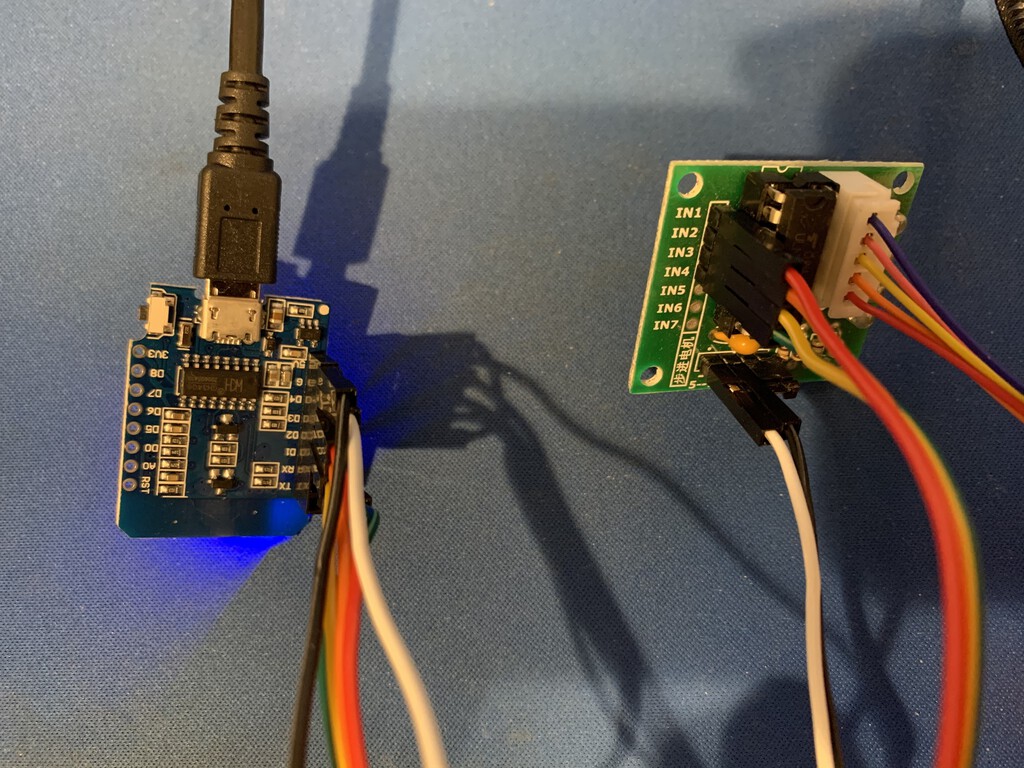
| D1 Mini | 28BYJ-48 Driver Board |
|---|---|
| 5V | 5V |
| GND | GND |
| D1 | IN1 |
| D2 | IN2 |
| D3 | IN3 |
| D4 | IN4 |
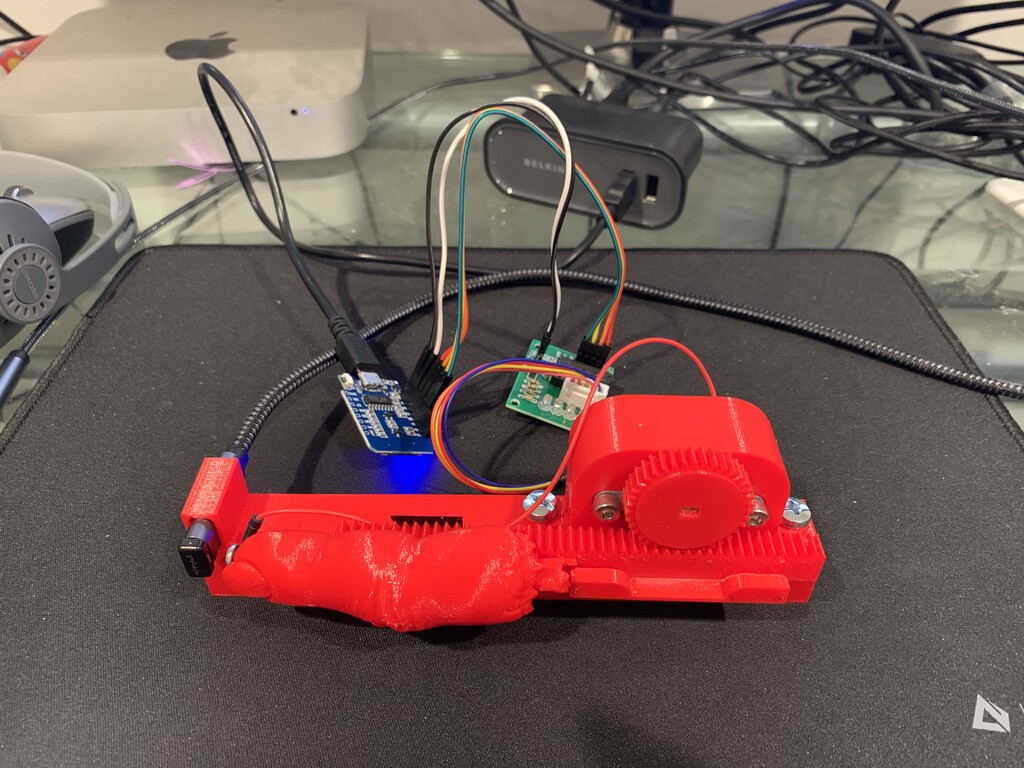
Once we put the stepper motor into the housing and screw everything together, it should look like this:
Software
The software is much more straightforward. The D1 Mini can be programmed using the Arduino IDE. First, we go into Preferences and add https://arduino.esp8266.com/stable/package_esp8266com_index.json under Additional Board Manager URLs. Then when you go into the Boards Managers, you can install the esp8266 package which includes the board LOLIN(WEMOS) D1 R2 & mini, which should be selected under Tools.
At this point I’ll run a sketch for blinking the LED just to verify that it’s working:
#define LED 2 //Define blinking LED pin

void setup() {
  pinMode(LED, OUTPUT); // Initialize the LED pin as an output
}
// the loop function runs over and over again forever
void loop() {
  digitalWrite(LED, LOW); // Turn the LED on (Note that LOW is the voltage level)
  delay(1000); // Wait for a second
  digitalWrite(LED, HIGH); // Turn the LED off by making the voltage HIGH
  delay(1000); // Wait for two seconds
}
I found this sketch that shows how to control the 28BYJ-48 Stepper Motor using WiFi.
Here are the parts that have to do with the motor:
int Pin1 = D1; //IN1 is connected
int Pin2 = D2; //IN2 is connected
int Pin3 = D3; //IN3 is connected
int Pin4 = D4; //IN4 is connected

int pole1[] ={0,0,0,0, 0,1,1,1, 0}; //pole1, 8 step values
int pole2[] ={0,0,0,1, 1,1,0,0, 0}; //pole2, 8 step values
int pole3[] ={0,1,1,1, 0,0,0,0, 0}; //pole3, 8 step values
int pole4[] ={1,1,0,0, 0,0,0,1, 0}; //pole4, 8 step values

int poleStep = 0;
int dirStatus = 3; // stores direction status 3= stop (do not change)
String argId[] ={"ccw", "cw"};

...

void loop(void) {
    server.handleClient();
    MDNS.update();

    if (dirStatus == 1) {
        poleStep++;
        driveStepper(poleStep);
    } else if (dirStatus == 2) {
        poleStep--;
        driveStepper(poleStep);
    } else {
        driveStepper(8);
    }

    if (poleStep>7) {
        poleStep=0;
    }

    if (poleStep<0) {
        poleStep=7;
    }

    delay(1);
}

/*
 * motorControl()
 * updates the value of "dirStatus" varible to 1, 2 or 3
 * returns nothing
 */
void motorControl() {
    if (server.arg(argId[0]) == "on") {
        dirStatus = 1;  // CCW
    } else if (server.arg(argId[0]) == "off") {
        dirStatus = 3;  // motor OFF
    } else if (server.arg(argId[1]) == "on") {
        dirStatus = 2;  // CW
    } else if (server.arg(argId[1]) == "off") {
        dirStatus = 3;  // motor OFF
    }
}

/*
 * @brief sends signal to the motor
 * @param "c" is integer representing the pol of motor
 * @return does not return anything
 */
void driveStepper(int c)
{
    digitalWrite(Pin1, pole1[c]);
    digitalWrite(Pin2, pole2[c]);
    digitalWrite(Pin3, pole3[c]);
    digitalWrite(Pin4, pole4[c]);
}
The way it works is that the web server displays two buttons: CCW (Counter clock-wise) and CW (Clock-wise). If either of these two buttons is toggled, it changes the dirStatus to 1 (for CCW) and 2 (for CW). If the button is toggled off, it changes the dirStatus to 3 to stop the motor.
You can see in the loop() function that it is checking this dirStatus to either increment the poleStep (until it loops around), decrement it (until it loops around), or stop it completely.
What we would like instead is a single HTTP endpoint that will move the motor counter-clockwise until it hits the Yubikey and then clockwise to retract, and then stop.
So we can rewrite the motorControl() function to simply:
void motorControl() {
  dirStatus = 1;    // CCW
}
which will start moving the motor counter-clockwise when the HTTP endpoint is called.
Then we modify the loop() function to move for 400 steps, change the direction to CW and move 400 steps in that direction, and then stop.
int steps = 0;

void loop(void) {
    server.handleClient();
    MDNS.update();

    if (dirStatus == 1) {
        poleStep++;
        driveStepper(poleStep);
        steps++;
    } else if (dirStatus == 2) {
        poleStep--;
        driveStepper(poleStep);
        steps++;
    } else {
        driveStepper(8);
    }

    if (poleStep>7) {
        poleStep=0;
    }

    if (poleStep<0) {
        poleStep=7;
    }

    if (steps > 400) {
        if (dirStatus == 1) {
            dirStatus = 2;  // CW
        } else {
            dirStatus = 3;  // motor OFF
        }
        steps = 0;
    }

    delay(1);
}
One nice thing about the physical design of The Finger is that it’s very forgiving: the motor isn’t very strong so once it hits the YubiKey, it can continue pushing counter-clockwise without damaging anything. And when it goes clockwise, eventually the bone sticking out of the finger knocks against the edge of the base, preventing it from falling off to the right. I started with the steps maxing out at 1000 and manually tested it, lowering it a bit each time until I found the sweet spot of 400 steps.
Then I checked the MAC address of the WiFi board, made a static IP mapping on my router for it, and made a local DNS entry of finger.localdomain to it as well.
Now if I make a call to http://finger.localdomain/press, the motor will push the finger towards the YubiKey and retract.
Triggering The Finger
If pressing a YubiKey with your finger isn’t very satisfying, pressing a key on a mechanical keyboard is on the opposite end of the spectrum. It would be cool if we could trigger the YubiKey just by hitting a key on our keyboard.
If you use a TKL layout, in the top right of your keyboard, you have Print Screen, Scroll Lock, and Pause, all of which don’t make a whole lot of sense in 2020 and are ripe for remapping.
I use a program called Karabiner-Elements to help with this remapping. Much like the hardware portion of this project, it is also a bit Rube Goldberg-esque.
Using the UI, under the Simple modifications tab, you can change “From key” to “pause” and “To key” to “f14”.
Then switch to the Misc tab and click “Open config folder (~/.config/karabiner)”. Here you’ll find a file called karabiner.json. Under the profiles.rules key, you can add this JSON:
          {
            "description": "F14 to trigger Yubikey",
            "manipulators": [
              {
                "from": {
                  "key_code": "f14",
                  "modifiers": {
                    "optional": ["any"]
                  }
                },
                "to": [
                  {
                    "shell_command": "osascript /Users/YOUR_USERNAME/bin/yubikey.scpt"
                  }
                ],
                "type": "basic"
              }
            ]
          },
In ~/bin/yubikey.scpt you can write an Applescript to call a shell script like this:
do shell script "/bin/sh ~/bin/yubikey.sh 2>&1 &"
Why have an Applescript call a shell script? I found that when I launched the shell script directly from Karabiner Elements, it opened a new instance of Terminal.app and took focus away from the window that is prompting for the YubiKey. This causes everything to run in the background.
Finally, in ~/bin/yubikey.sh, we have:
#!/bin/bash
curl "http://finger.localdomain/press" --silent >> /dev/null
This is what it looks like in action:
I made a fake YubiKey prompt to demo this, but I assure you that it works on real YubiKey prompts as well. Here’s the code for the fake YubiKey prompt in case for some reason you need to make fake YubiKey prompts:
#!/bin/bash
printf "YubiKey for 'bert': "
read yubikey
green=`tput setaf 2`
reset=`tput sgr0`
echo "${green}SUCCESS${reset}"
Now that we have that shell script, we can call it from other places as well. iTerm2 has a feature called Triggers, which can execute actions based on text matching a regex in your terminal. So we could write a regex to listen for “Yubikey for” and have it run the same script, eliminating the need to press buttons altogether.
Another option would be to make a custom Chrome extension that waits for certain URLs that request YubiKeys and makes a browser fetch to our HTTP endpoint in the background.
Final Thoughts
I showed this to someone and they said, “So.. you built a button that you press that will press a button? Why not just press the button?” which was a bit infuriating because they clearly missed the whole point. “Don’t you get it? This button BAD, but this button GOOD. Me want to press GOOD button.”
Work on the things that matter to you.